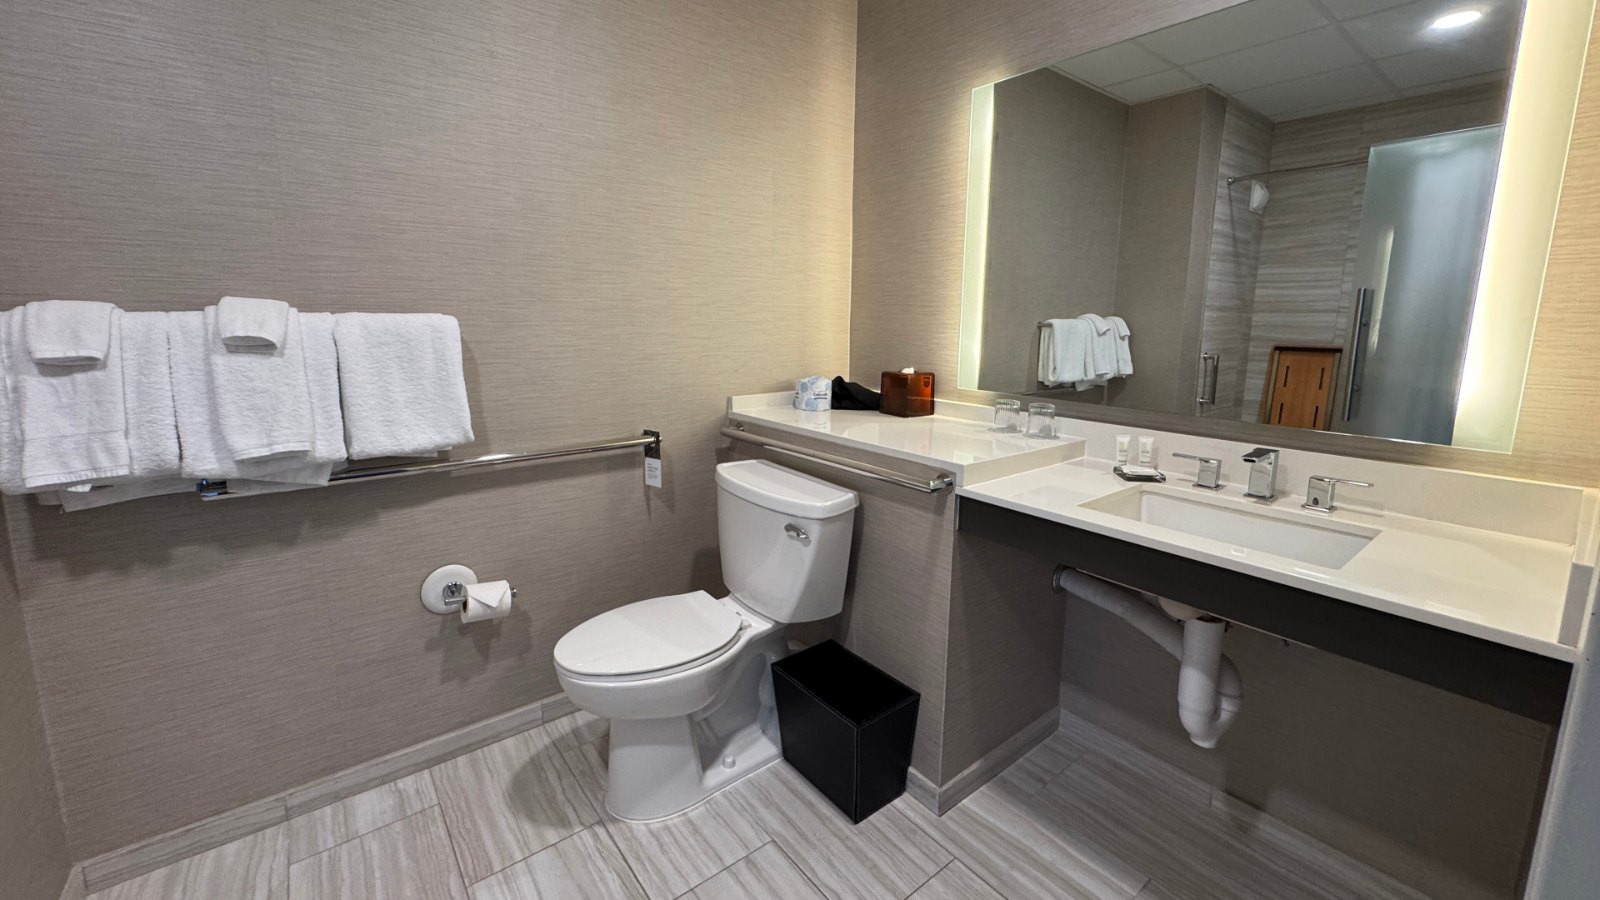
The short version: A bidet seat is one of the last pieces of an aging-in-place bathroom, but it depends on decisions made early. While the walls are open, add a grounded, GFCI-protected outlet within reach of the seat’s cord, install blocking for grab bars, and confirm the water supply valve and side clearance. Then set the toilet, and fit the seat last.
Aging in place means staying in your own home and community as you get older, safely, independently and comfortably. An aging-in-place bathroom is one planned with that goal in mind.
Most aging-in-place bathroom updates follow a familiar list: a taller toilet, grab bars, a shower you can walk or roll into, easier handles, better light, a floor that grips, and a wider door. A bidet seat belongs on that list for many households because it reduces how much twisting and reaching the toilet asks of a person. It also needs power, water and space, and those are cheapest to provide before the drywall goes back up.
For reference, the U.S. Access Board’s ADA guide places an accessible toilet’s centerline 16 to 18 inches from the side wall, sets the seat height at 17 to 19 inches to the top of the seat, and puts grab bars 33 to 36 inches above the floor. A private home does not have to meet those figures, but they are a useful starting point for planning the toilet area.
On this page
How Each Common Change Relates to a Bidet Seat
None of the usual aging-in-place bathroom changes conflict with a bidet seat, but several affect how well one works. Here is how each one connects.
Comfort-Height Toilet
A taller toilet, or a riser that lifts the seat of the existing one, is a standard item on aging-in-place checklists. If you are replacing the toilet anyway, choose the bowl with the bidet seat in mind. Many seats are sold in separate elongated and round versions, so the bowl shape decides which one you order. Our elongated vs round guide explains the difference.
A raised seat that clips onto the bowl generally cannot be combined with a bidet seat, so a comfort-height bowl is usually the simpler route to a higher seat. A bidet seat can sit slightly higher or lower than the seat it replaces, so check the published dimensions. Our seat height guide covers the measurements.
Grab Bars
Grab bars near the toilet are on every aging-in-place list. Their positions also decide where a bidet seat’s side control panel, a wall-mounted remote and the outlet can go. Plan all of them on one drawing, so the bar the person grabs is not blocked by a control arm or a power cord. Our grab bar clearance guide goes through the conflicts one by one.
Curbless or Low-Threshold Shower
A curbless shower takes away the step into the stall. A shower does not change the bidet itself, but in a small bathroom it competes with the toilet for floor space. If the layout is changing, keep enough clear floor beside the toilet for someone to turn, stand or help, and leave the area around the seat’s power cord dry.
Lever Handles and Controls
Lever-style faucets are a common recommendation for anyone with arthritis or joint pain, and the same idea carries over to bidet controls. A wall-mounted remote with large, labeled buttons is often easier to use than a small side panel. The Brondell Swash 1400 has a wireless remote that saves settings for two users, and the TOTO Washlet S5 has a remote with memory settings for up to four users. Our limited mobility guide compares control styles.
Lighting
A night-light in the bathroom is a common aging-in-place addition, and some bidet seats include one. The Brondell Swash 1400 has a blue night light and the Bio Bidet BB-2000 Bliss has one too, while the TOTO Washlet C5 does not. A seat light helps someone find the toilet at night, but it does not replace a plug-in or hardwired path light from the bedroom.
Non-Slip Flooring
Slip-resistant flooring belongs in the whole bathroom, not just the shower. A bidet seat adds a water connection at the base of the toilet, so a slip-resistant floor that shows water is a sensible pairing. A slow drip at the valve is easier to catch on a light, matte surface.
A Wider Door
Aging-in-place guidelines call for doorways with at least 32 inches of clear width, which usually takes a 36-inch door. A door does not change the bidet, but it does change who can help. If a caregiver or a walker needs to fit beside the toilet, the door and the clear floor space should be planned together.
Four Things to Plan While the Walls Are Open
These four items are easiest to handle during a remodel, because the electrician, carpenter and plumber are already there. Done after the tile and paint are finished, most of them mean opening a finished wall, moving fixtures or living with an awkward workaround.
An Outlet Beside the Toilet
Electric bidet seats run on a standard grounded 120-volt outlet, and cords are short. TOTO’s installation page says the outlet should be within three feet of the toilet for its three-foot Washlet cord. On our reviewed seats, cords run about 3.5 to 4 feet. Ask the electrician to add a GFCI-protected outlet on the side where your seat’s cord exits.
Keep the outlet clear of the grab bar zone and away from the shower spray. Our outlet requirements guide covers height, placement and why an extension cord is not a substitute.
Blocking in the Walls for Grab Bars
Grab bars need solid wood or other reinforcement behind the wall surface. The ADA guide for residential units lets grab bars be installed after construction if the walls are reinforced. A home can use the same idea. Have the carpenter add blocking along the side and rear walls of the toilet area now, even if the bars go up later. Take a photo with a tape measure in the frame before the drywall closes.
Supply Valve Position
Most bidet seats connect through a T-valve fitted where the supply hose meets the bottom of the toilet tank, with a short hose running up to the seat. TOTO’s E200 manual lists a 1.5-foot connection hose and a supply pressure of 20 to 80 PSI. A quarter-turn valve placed where it can be reached without kneeling behind the bowl helps both installation and later shutoffs.
Space Beside the Toilet
The ADA reference is a clear floor area around the toilet at least 60 inches wide and 56 inches deep. (The 59-inch depth sometimes quoted applies to an accessible toilet stall with a floor-mounted toilet.) Many homes cannot reach that, and it is not required at home. If the floor plan is changing, though, give priority to open space on one side of the toilet. That is where a person transfers, a helper stands and a side control panel needs room.
The Order to Do the Work In
The order follows the trades. First, during rough-in with the walls open, the electrician adds the outlet, the carpenter adds blocking, and the plumber sets the supply valve where you want it. Inspections, insulation and drywall follow. Tile, flooring, paint and lighting fixtures come next.
Then the toilet goes in, followed by the grab bars on the reinforced walls. The bidet seat goes on last, after the toilet is level and sealed and the bars are mounted, so you can check the control panel and cord against the bars. Our installation walkthrough covers the steps.
A Planning Checklist
Use this table to plan the work with your contractor. The middle column explains why each change matters for the bidet seat specifically.
| Change | Why it matters with a bidet | When to do it |
|---|---|---|
| GFCI outlet beside the toilet | Electric seats need a grounded outlet within reach of a 3 to 4 foot cord | Rough-in, walls open |
| Blocking for grab bars | Lets bars go exactly where controls and cord will not interfere | Rough-in, walls open |
| Supply valve position | The T-valve and hose need room, and the valve should be easy to reach | Rough-in plumbing |
| Clear space beside the toilet | Room for transfers, a helper and a side control panel | Layout stage |
| Wider door | Lets a helper or walker reach the toilet area | Framing |
| Non-slip flooring | Grips and shows water near the supply connection | Finishes |
| Lighting and night-light | Helps at night, whether or not the seat has its own light | Rough-in wiring, then fixtures |
| Comfort-height toilet | Choose a bowl shape that matches the seat you plan to buy | After finishes |
| Grab bars | Mount before the seat so clearance can be checked | After the toilet |
| Bidet seat | Installed last on a finished, level toilet | Final step |
Integrated Bidet Toilet or a Seat on a New Toilet
A remodel is the one time an integrated bidet toilet is easy to consider, since the old toilet is coming out anyway. These units combine bowl and bidet in one fixture. TOTO’s spec sheet for its G5A integrated toilet lists a 120-volt, 15-amp GFCI outlet, a 1,276-watt rating and a 12-inch rough-in, and it recommends a surge protector. The power draw is higher than a seat like the Washlet E200, which TOTO rates at 410 watts.
A separate comfort-height toilet with a bidet seat keeps the two parts independent. If the seat wears out or the person’s needs change, you can swap the seat without touching the toilet. An integrated unit gives a cleaner look and fewer exposed hoses, but it fixes the bowl height and controls you start with.
Either way, the same planning applies: an outlet, a valve and blocking. Confirm your rough-in measurement against the spec sheet before ordering. Price ranges for seats and integrated toilets are on our bidet cost page.
Who to Bring Into the Project
An occupational therapist can look at how the person moves in the bathroom: how they sit, stand, reach and turn. That shapes grab bar placement, toilet height and which bidet controls make sense. Ask the person’s doctor about a referral if bathroom tasks are getting harder, and leave anything medical to them.
A Certified Aging-in-Place Specialist (CAPS) holds a designation from the National Association of Home Builders (NAHB) covering home modifications for aging in place. The NAHB keeps a directory of CAPS credential holders on its website. It helps to give the CAPS remodeler the occupational therapist’s notes and the spec sheet of the bidet seat you have in mind.
Paying for the Work
Help with home modification costs varies by location and situation, so start locally. The federal Administration for Community Living says your local Area Agency on Aging can tell you what services exist and whether you qualify for modification and repair funds. Adults 60 and older may qualify under Title III of the Older Americans Act. The Eldercare Locator, at 1-800-677-1116, will connect you with that office.
In eligible rural areas, USDA’s Section 504 Home Repair program offers loans to very-low-income homeowners and grants to those 62 and older for removing health and safety hazards. Whether a bidet seat qualifies under any program is up to that program, so ask before you buy. For questions about taxes or benefits, speak with a tax professional or the agency directly.
If you are still deciding whether a bidet seat suits the person at all, our bidet buying guide for seniors is the place to start. Once the outlet, blocking and valve are in, adding the seat later is a small job.
Image credit: Public domain (CC0), via Wikimedia Commons: accessible hotel bathroom photo by Sarah Stierch (Missvain), cropped.